Water treatment
Why is water treatment important?
No matter how much water you store, it will eventually run out. In an emergency, you might suddenly find yourself without clean, safe water to drink. Knowing how to treat new water sources and make them safe will help you "be ready." Just remember: always start with the cleanest water you can find.
Never assume outdoor water is safe to drink just because it looks clean and is flowing. Treat all outdoor water sources with caution—you cannot afford to get sick, especially during an emergency. If there is any question as to the safety of your water, from inside or outside sources, treat it.
The three-step water treatment process
To make sure your water is safe, use a three-step process. Always start by choosing the cleanest water source available.
- Pre-filtration
- Filtration
- Purification
Step 1: Pre-filtration
Pre-filtration removes the big "chunks" of dirt and sand. While your main filter can block these big particles, doing so will clog it quickly. Pre-filtering saves you money and makes your main filter last longer.
How to do it:
- Let cloudy water sit in a container so the heavy dirt settles to the bottom, or skim debris off the top.
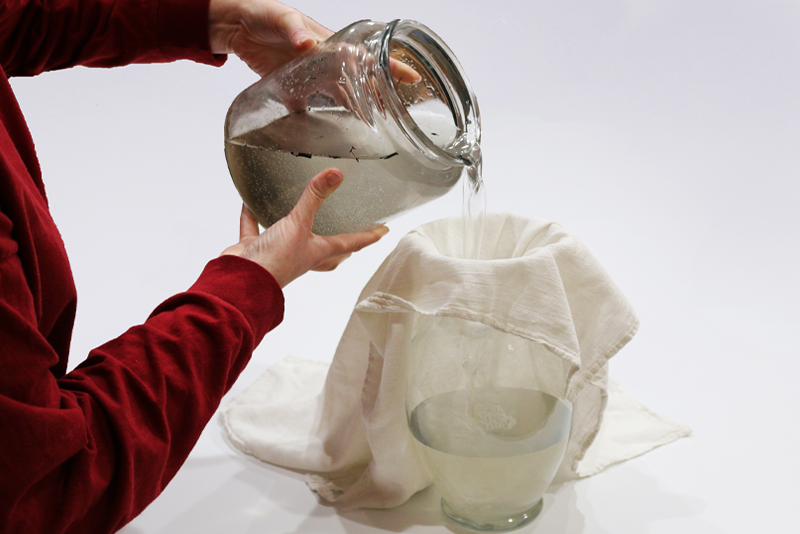
- Pour the water through a clean piece of cloth, cotton, cheesecloth, or a t-shirt into a clean container.
Note: Pre-filtered water is still not safe to drink! You must filter and purify it next.
Step 2: Filtration
Filtration uses a physical barrier to trap germs and dirt as water passes through. Filters are rated by "microns"—the lower the micron number, the smaller the particles it can catch. Depending on the filter, it can remove chemicals, dirt, bacteria, and heavy metals.
All filters have a suggested water capacity for replacement. Refer to manufactures directions for replacement or cleaning. Ask local outdoor or preparedness dealers to help you find which water filters are right for your preparedness needs and budget.
Common filter types:
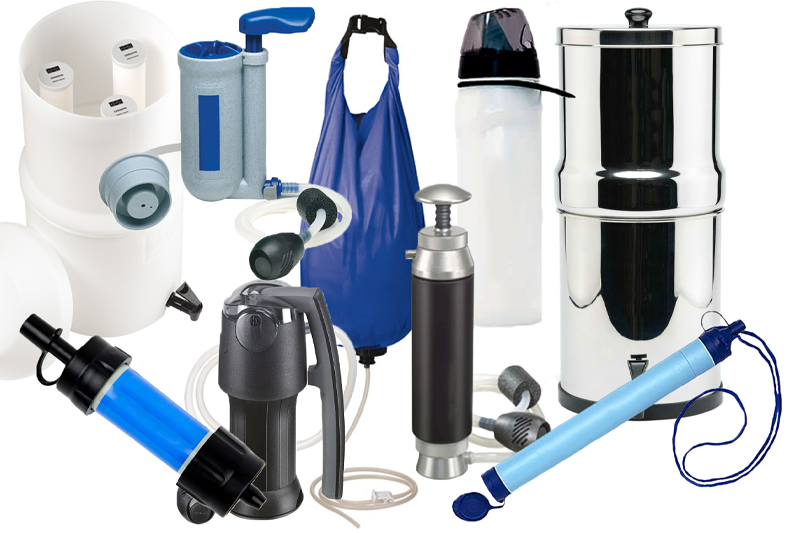
Gravity filters: Water is pulled down through the filter by gravity. They are slower and larger than other filters but they work without you needing to pump. They work well for at home, work, or camping with a group.
Pump filters: You manually pump water through the filter. They work quickly and are great for group emergency kits.
Straw and water bottle filters: Made for single person use. You drink straight through the filter like an ordinary straw. Some of these can also be used in the line of a hydration bladder for filtration on the go. For the best results, purify the water before drinking through these.
Ceramic and fiberglass filters: These materials contain microscopic pores that block germs. Ceramic filters can be scrubbed clean to reuse, while fiberglass filters must be replaced.
Activated carbon: Helps remove chemicals, bad odors, and bad tastes. Carbon alone will not remove dangerous germs, but it is often combined with other filter materials.
Step 3: Purification
Purification uses heat, UV light, or chemicals to kill living germs. Most purification methods kill germs, but they do not remove sediment, chemicals, heavy metals, or dissolved minerals.
Heat purification:
Boiling (Recommended): Bring water to a rolling boil for three minutes (at typical Utah elevations) to kill all germs, then let it cool. Higher elevations require longer boiling times. Covering the pot helps water boil faster and saves fuel.
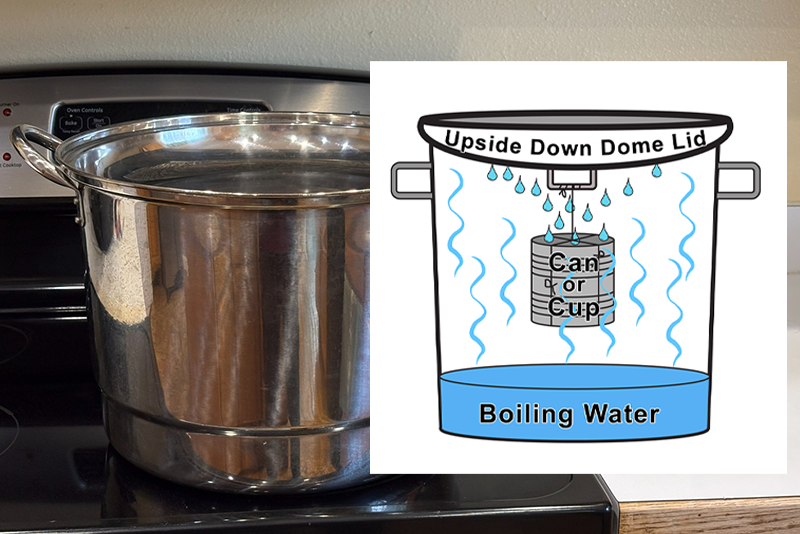
Distilling: This process involves boiling water and collecting the steam as it turns back into liquid. Distillation is great because it kills germs and leaves behind heavy metals, salts, and chemicals.
- Easy distiller: Fill a pot halfway with water. Tie a cup to the handle on the pot’s concave lid so that the cup will hang right-side-up when the lid is upside-down. Make sure the cup is not dangling in the water. Boil the water for 20 minutes. The water that drips from the lid into the cup is distilled. Let it cool before drinking.
UV light purification
UV pens: Battery-powered devices are great for small amounts of water or travel, but it's not practical for large groups.
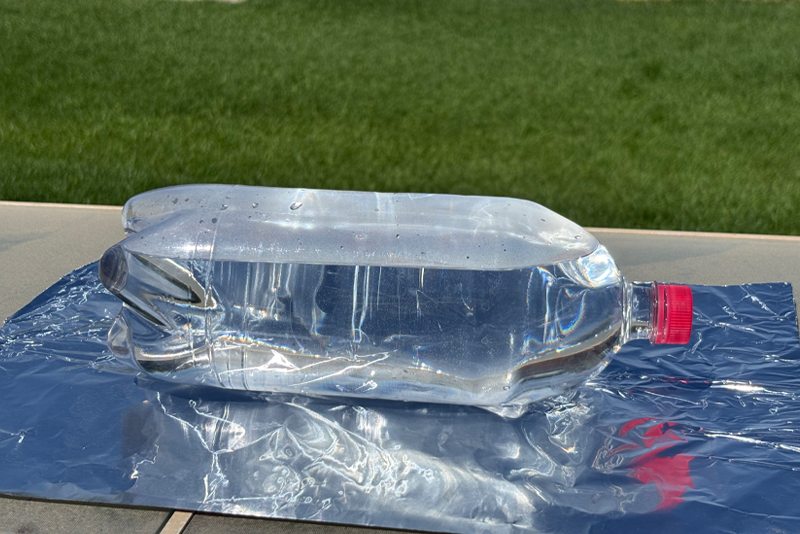
Sunlight: Also known as the SODIS or Solar Disinfection method. Fill a clear plastic soda bottle (2 liters or smaller) with pre-filtered water. It is not very effective with cloudy water. Lay it flat in the direct sun on a shiny surface like foil, for 6 hours on a sunny day, or 2 days if the sky is cloudy.
Chemical purification
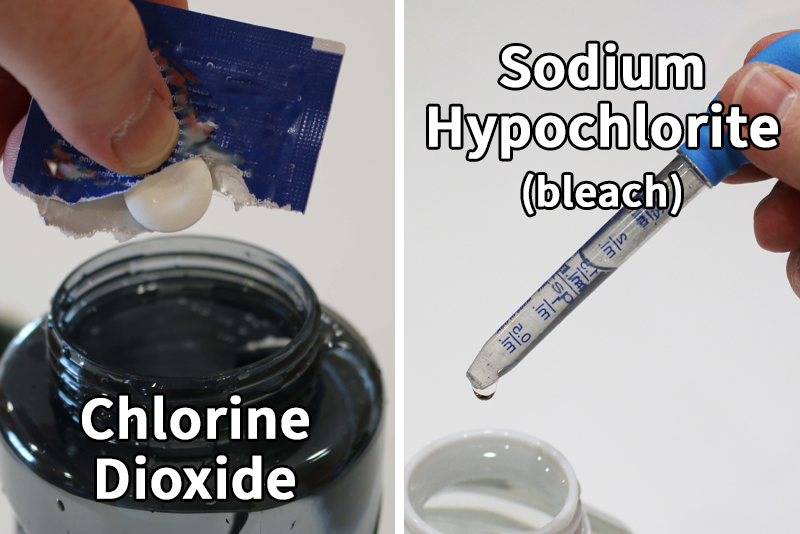
Chlorine dioxide (recommended): Comes in liquid or tablets. It kills germs safely without ruining the taste or color of the water. It lasts four to five years in storage. Follow manufacturer's directions.
Liquid bleach (sodium hypochlorite): Use only plain, unscented bleach. It lasts six months to a year in storage. Add about eight drops per gallon, stir, and wait 30 minutes. If it does not smell faintly like bleach, add eight more drops and wait another 30 minutes. If there is still no smell, discard the water.
Dry bleach (calcium hypochlorite or pool shock): Lasts 10 to 12 years in storage if it is kept cool, dark, and dry. Store it in it's original plastic bag. Measure a half cup of dry bleach granuals and add to one gallon of water. This is NOT drinking water, but a chemical solution similar to sodium hypochlorite liquid bleach that lasts about a year in storage. Use this solution like you would use liquid bleach. Add about 8 drops per gallon, stir, and wait 30 minutes for water purification.
Iodine: Available in drops or tablets. It works well short-term, but do not use it for more than a few weeks. It lasts four to five years in storage. Do not use iodine if you are pregnant, have an allergy to iodine, or have a thyroid condition. It's not as effective as chlorine dioxide, but it will kill viruses and most bacteria.